
The child sizes of the Pomona Sweater has the option for short row shaping at 3 places: at the collar, at the raglan and at the hem. The pattern is written so you can mix and match any of them, work all of them or leave short shaping out completely if you are not comfortable with the technique.
Where and why?
In general, short row shaping is used to change the length of the fabric over a certain number of stitch columns without affecting the width of the work, thus creating slopes/curves/puffs in the fabric. It is achieved by leaving some stitches of certain rows unworked (=the work is turned before the end of the row).
Short rows are interrupting stitch patterns and therefore they are usually worked in stockinette stitch. You will see that in the Pomona Sweater pattern you will work short rows in the diagonal rib stitch pattern yet the stitch pattern remains uninterrupted. This is because the turning points are right before establishing the stitch pattern or in the last row before binding off.
Collar short row shaping
Adding short rows to (or rather taking away some fabric from the front of…) the collar creates that nice curve at the back neck, resulting in a more tailored look of the collar. In this option, short row turns are worked in the width of the sleeves between the 2-3 and 3-4 raglan markers in diagonal rib stitch pattern. The short rows in this case are lengthening, which means with every row they are worked further away from the center of the work.


Without the short row shaping of the collar you will have more fabric at the fronts, which will create more drapes when the sweater is not buttoned up:


Raglan short row shaping
You can add further shaping to the front neckline if you choose to knit the Pomona Sweater with the raglan short row shaping option. The short row turns are now worked in the fronts, that is before the first and after the last raglan markers, in stockinette stitch (you may see the diagonal line caused by the short row turns below the buttons on both sides of the fronts below).


Without the short row shaping the back neck will have the same height as the front neck, which can make the sweater less comfortable (the human body has a natural curve at the back, which takes up more fabric than the front, and that is why clothes are made with lower front necklines).
Hem short row shaping
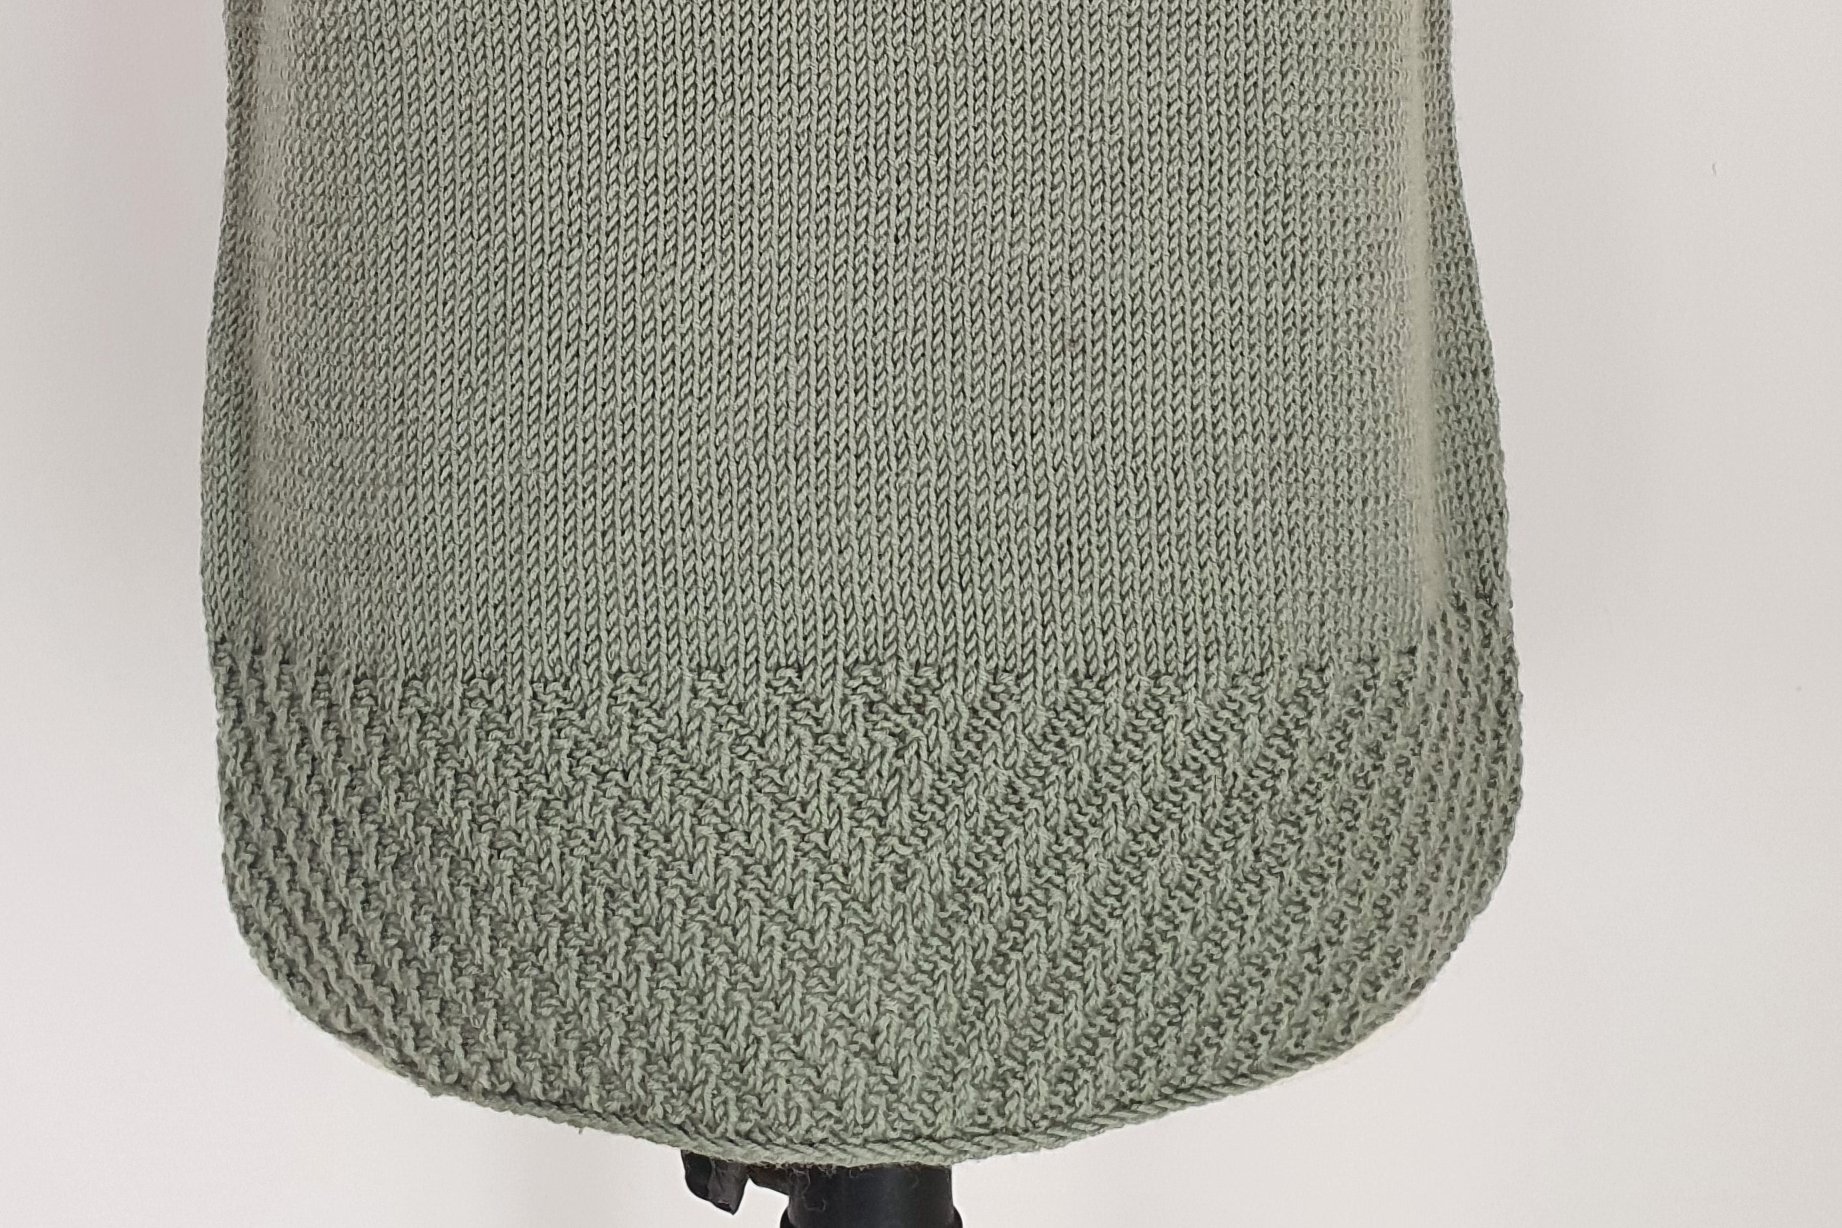
The third option for short row shaping is at the hem. Short rows here are creating a curve at the bottom of the back, making the fronts a bit shorter but creating a nice complement to the curve produced by the short row shaping at the back neck. This is worked in diagonal rib stitch pattern as well. In this case shortening short rows are worked, which means that the rows are turned closer to the center of the work on each row.
Hem with short row shaping:
Hem without short row shaping:

How?
This is the big question. There are many techniques for making short rows and you may use any of them because they all produce a very similar effect. For me, the “wrap and turn” is the ultimate short row technique, this is what I learnt first, what I got used to, so this is the method I use in this pattern. But I understand that many knitters find German short rows easier and less visible, so I will write a few notes at the end of this article about how to work the instructions when you want to use the German short row method instead of the wrap and turn. But first, let’s see how I do the w&t.
Wrap and turn
The name is basically covers what you have to do: wrap the yarn around the turning stitch and turn your work. The turning stitch can be either after a knit or a purl stitch.
Wrap after a knit stitch: the working yarn is already at the back, so it is more convenient to wrap the next stitch from the back to the front:
Wrap after a purl stitch: the working yarn is already at the front of the work, so it is more convenient to wrap the next stitch from the front to the back:
Unfortunately this is not all, because the way you will conceal that wrapped stitch later will depend on the position of the turn. You will run into short row turns both on the right and wrong side of the fabric and it also matters if you wrapped a knit or a purl stitch… The most important thing to remember is that you have to work the wrapped stitch so that the wrap will fall on the wrong side of your work, where it remains hidden.
Wrapped stitch is a knit stitch, right side of work is facing you
Knit the stitch and the wrap around it together.
Wrapped stitch is a purl stitch, right side of work is facing you
This time, you have to place the wrap on the needle to be able to purl the wrap and the turning stitch together. The purl bump will be a bit thicker from the right side of the work, but the wrap will fall on the wrong side and it will be invisible at the end.
Wrapped stitch is a knit stitch, wrong side of work is facing you
When you are working on the wrong side, you have to conceal the wrap and the stitch so that the wrap will fall towards you. You can achieve this by inserting the right hand needle into the back “leg” of the wrap, put it on the left hand needle and knit the wrap and the stitch together.
Wrapped stitch is a purl stitch, wrong side of work is facing you
Put the wrap on left hand needle the same way as you did above and purl the wrap and the stitch together.
I know that this seems complicated at first but by the time you get to the hem of the Pomona Sweater, you will get used to it.
You can watch the full video on YouTube:
How to change pattern instructions to German short rows
If you prefer the German short row method over wrap and turn, you have to remember one thing: while in the w&t method you stop working 1 stitch before the turning stitch, wrap the yarn around it and turn your work, the German short row method is worked differently, which means you need to work the turning stitch, too.
In other words, when you read srr (short row turn right) or srl (short row turn left) in the Pomona Sweater pattern, you have to work that stitch in pattern, turn your work and pull the working yarn up.
This way you will have the same result as in the sample.
I hope you found this article helpful. If you need any assistance with the pattern, please contact me via this form or send an email to gynkaknitwear@gmail.com
Happy Knitting!
Mici
